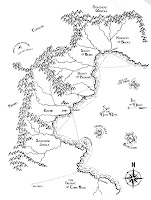
 Okay, so now after all the hard work from the last 3 tutorials (part 1, part 2, part 3),
the real fun begins. We're going to add the final touches to your map
to really spark your players imaginations. Once again, we'll be using GIMP, the free open source image manipulation application
to wrap-up our map project. If you have access to Adobe Photoshop, you
can use that app as well. The methods and techniques will be very
similar.
Okay, so now after all the hard work from the last 3 tutorials (part 1, part 2, part 3),
the real fun begins. We're going to add the final touches to your map
to really spark your players imaginations. Once again, we'll be using GIMP, the free open source image manipulation application
to wrap-up our map project. If you have access to Adobe Photoshop, you
can use that app as well. The methods and techniques will be very
similar.In tutorial 3, we went over a number of GIMP's features that helped you enhance your hand drawn map. We'll be using some of them for the final portions of the map. I'll cover some in this lesson but you may want to go over those techniques in lesson 3 if you haven't already.
The first thing that you want to do is open your flattened map file that you created in lesson 3 into GIMP. This flattened file will include all the text and the hand drawn, inked map background all on a single layer.
In your layers pallet, you will want to change the name of the layer from Background to Map. This way, we can add layers beneath the map layer as well as above if need be.
The next thing you want to do is to change the mode of the map file from Grayscale to RGB. To do that, go to Image >> Mode >> then select RGB. Your map is now ready to accept color information.
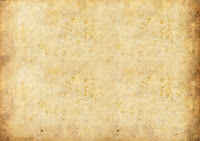 You are now going to add the paper texture background to your map. Download the image file to the right by clicking on the image so it opens on it's own, then right-clicking select Save Image As... and save the image to your desktop.
Open that image in GIMP. Copy the image and paste it into the map
file. When you paste it into your map file you won't see it right away
but a new layer will be created called "Floating Selection (Pasted Layer)". Double click on that layer name and rename it 'Paper Background'.
You should now see the paper texture. You can resize and position
the paper using the scale tool, rotate tool and the move tool as needed.
You are now going to add the paper texture background to your map. Download the image file to the right by clicking on the image so it opens on it's own, then right-clicking select Save Image As... and save the image to your desktop.
Open that image in GIMP. Copy the image and paste it into the map
file. When you paste it into your map file you won't see it right away
but a new layer will be created called "Floating Selection (Pasted Layer)". Double click on that layer name and rename it 'Paper Background'.
You should now see the paper texture. You can resize and position
the paper using the scale tool, rotate tool and the move tool as needed.After you have scaled and positioned the paper texture to fill the map area you want to move the Paper Background layer below the map layer. Now select the map layer and under the Mode drop-down menu select Multiply. You will now see your map drawing on top of the texture paper background. Already things are looking pretty good, right?
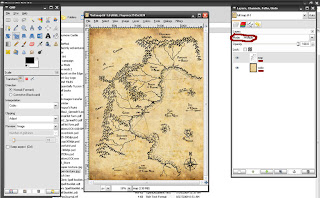
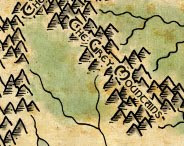
We're going to add a little color to the map to give it a hand painted appearance. Each color element will be on it's own layer. We'll start with the coastline. I like to add the color of water along the coast and lake shores. Select the Airbrush tool, then choose a fill color from the color pallet. Create a new layer and call it Coast and place it below the Map layer but above the Paper Background layer. With the Coast layer selected, choose Multiply from the Mode Drop-down menu once again. Now adjust the brush scale and begin painting along the coastline. I like to paint just the area of the ripples that I drew along the coast. You're painting doesn't have to be perfect, in fact, the more loose you are with it, the more handmade it looks. Using the Airbursh tool in this way can give a nice watercolor look to the colors you add to the map. You'll also notice that the texture of the background paper shows through the color as well when you have the layer mode set to Multiply.
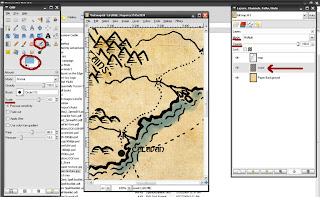
Keep working your coastline and don't forget your river inlets, islands and lakes, altering the brush scale as needed.
 Now,
repeat this technique with other color elements such as forest or
jungle, mountains and hills, whatever your imagination comes up with. I
use the paper texture background as the general color of the land
masses and just add color highlights. For example, at this scale, I
didn't add any forests or jungles by hand, but instead I will add the
colors to represent those areas. Again, I may have to adjust the
opacity of a layer to get the right effect.
Now,
repeat this technique with other color elements such as forest or
jungle, mountains and hills, whatever your imagination comes up with. I
use the paper texture background as the general color of the land
masses and just add color highlights. For example, at this scale, I
didn't add any forests or jungles by hand, but instead I will add the
colors to represent those areas. Again, I may have to adjust the
opacity of a layer to get the right effect.For the mountains, I use a gray tone and fill the shadowed area on the left side. Remember things don't have to be perfect, in fact the less perfect they are the better. It gives it that hand painted quality. Also note that all the colors are below the black outlines of the map. Those black outlines will cover any odd coloring 'out of the line' marks that you make.
Color in any other details that you've added to your map and with a little work, you can have a great prop to hand to your players. Below is my completed copy of the campaign world map.
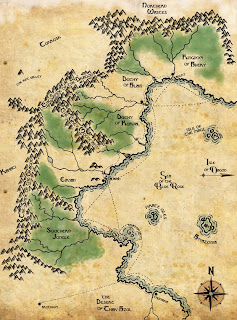
Now, at this scale I get a pretty broad view of the lands, but my campaign is beginning in the Region of Eir'ian. So I followed the same techniques in these tutorials and created a detailed map of just that area.
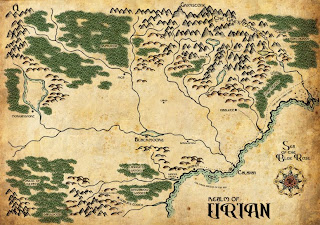
You may notice that in this scale, I added 'trees' for the forested areas and additional towns and labeled areas of interest. This was going to be the map that I hand to my players but after a couple of sessions I realized that these level 1 grunts weren't going to need all this land to explore for quite a while so I 'zoomed' in a bit more and created this map:
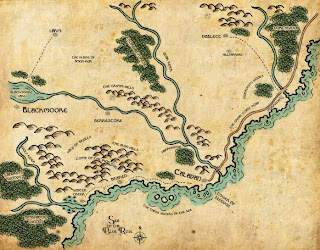
This represents a tighter area of exploration that my players may actually get to. I focused more on the details of the smaller scale, again adding more areas of interest, towns and ruins. This is the main focus of my sandbox campaign but if I need to expand it then I have a general idea of what is out there. That is my argument for a top-down approach to map making/world building/campaign construction. All of these later maps were created using the same methods that I explained in these 4 posted tutorials.
I hope you found some of these hints and methods useful and I hope you use them in your creative campaign endeavors!
Start over with Part 1

No comments:
Post a Comment